Secondary bonding has limitations due to the strength of the adhesive. Parts that are all bonded as one piece are stronger and do not require that additional time to bond to other structures. On the other hand, complicated tools often complicate layups. Complicated layup processes make for a tougher time getting high quality parts consistently. It is all a trade off dependent on experience and ultimately the part needed.
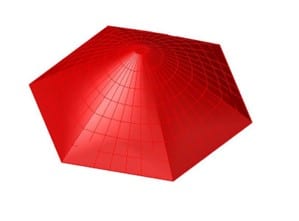
Prepare the plug (example to the right) for tool fabrication by cleaning the surface with isopropyl alcohol or other cleaning material as plug surface allows. Soaps and other materials may be used accordingly. Apply a release agent over the parts surface in which the tool will be laid up to per manufacturer’s specification that is compatible with the pug surface. Place the part on a flat tooling surface. This surface could be aluminum, steel, plastic, or other material. However, it will need to also have a mold release applied to its surface so that the tooling gelcoat / resin / plys will not stick to the surface. As an option, wide tooling tapes offer a selection that could substitute as mold release on these flat surfaces. (If tooling tape is added to the plug surface this may make final part dimensions off by the thickness of the tooling tape).
If the part is not flat to the tooling surface, a filler should be used and pressed onto the area to provide a seamless transition between the surfaces for ply layup above. Multiple materials could be used for this purpose, but plasticine roll modeling clay has proven to be effective in most tooling needs as it is reformable and easily removable after tooling reinforcements have been cured.
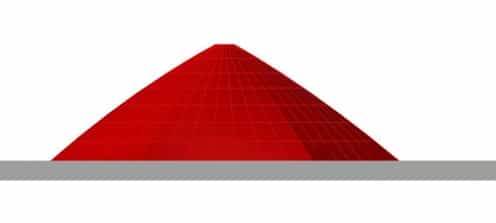
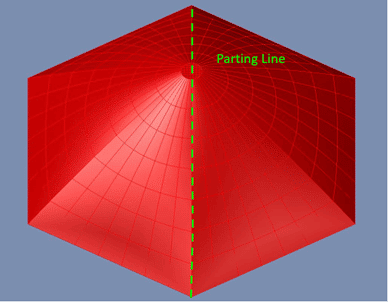
When making a split mold, a good parting line is a must for successful tooling fabrication. For most DIY jobs, a CNC router is probably not going to be used. A CNC router makes tool fabrication much easier. However, this can still be done by hand and made to the same quality specifications when practiced correctly. Usually a parting line is made halfway through the part. It is used to split the mold in an area that would otherwise not demold on its on effectively. This parting line will still allow for one-piece parts upon lamination. In this case, the tooling surface is going to be more complicated than the part itself. However, the time spent making a quality split mold can yield many successful parts that would otherwise need 2 or more pieces joined down the road. One-piece parts are also much stronger than having the bond 2.
Once a parting line is established, the line will need to be cut exact to the profile. There are a few ways to get this profile depending on the part that is being made. Upon cutting the parting line profile in the block, clean the block and apply release agent as done with the plug and flat plate tooling surfaces. Mate the profiled block back to the plug surface. Fill any gaps between the plug and the parting tool’s surface using respective filler. This will need to be as seamless to the part as possible. Any mistakes during this process and the tool may result in headache with an unsatisfactory part.
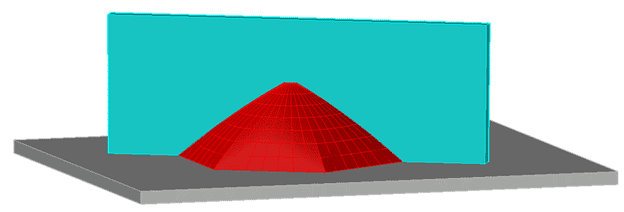
Layup the tooling surface as needed with gelcoat, fabric material, tooling resin as needed. This may vary from part to part on how far to go up or out on the tooling surface. Remember to leave enough room to drill holes in the parting lines. Parting lines in the tool can also act as reinforcement to the tool’s dimensional stability. So, doing a little extra is not usually going to hurt anything. For a minimum, go beyond the plug surface 2-3” in all directions. It is important to leave enough room on the tool’s flanges for any bagging or infusion processes needed. In most cases a 6” buffer for the bagging area flanges will suffice and less can accommodate needs in the parting line. At this point it is important to note how many layers were applied to each section of the tool so that the other side can be mirrored to this layup in future steps.
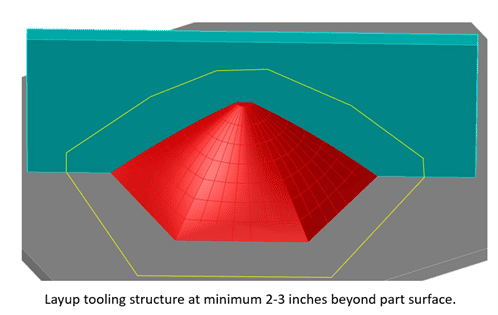
Once the first tool piece is cured out successfully, strip the parting line tool away from the mold surface cautiously. Do not remove the tooling surface that is already halfway complete. After the parting line is removed, cleaning, prep, and layup of the mating side of the tool can begin. To prep the tool for the next step in the layup process, deburr any sharp edges along the parting mating surface of the tool. Clean all surfaces with isopropyl alcohol. Once tool is clean and dry, apply needed mold release to all surfaces in which the other tool’s side can be laid up upon. (Basically, repeating the same process as above for preparation.)
Once prep is complete, mirror the layup and cure of the first side’s layup. Once part is laid up, bagged (if needed), and cured, mark areas along the parting line of the tool for holes to be drilled. Drill these holes before stripping the part! It will ensure that the tools mating together the same way as they were cured initially.
Once the holes have been drilled, test your bolts to ensure they have a proper fit and can be applied in with ease. After verification, remove the 2 tooling surfaces. Clean & Prep the tools for layup processes as (2) separate tools. This will ensure cleanliness of both parts, mold release is adequately applied for layup, and the tool’s (2) surfaces will have no issues mating up together. Once both the tools are prepped and both sides have been mated together using chosen fasteners, application of a Flashbreaker (1) tape may aid in making the part surface more seamless if gaps are present.
Proceed with layup of the needed part just as any other part that has been fabricated for the chosen process. The difference in stripping processes for these types of tools is a little different. Instead of stripping the part from the tool, disassemble the tool and strip it way from the part.
When deciding on which route to go with any tooling project, it is important to research the project at hand. In composites there are a million differing routes to choose from. For this reason, look at the manufacture of the original part or of parts similar in nature that have been fabricated from a fabric reinforced composite. Most often one does not have to reinvent the wheel, Only dive into established composite processes at hand. There will be differences with any layup, but the ideas are out there to brainstorm and find the right processes for the composite part needed.
When a part is too complicated to make out of a two-piece mold, secondary bonding processes offer an easier and sometimes faster way of creating needed parts. For these processes, flanges in the part’s design are key. Establish simple and flat areas to join mating surfaces to one another, if possible. It is best to make these joining surfaces in areas that are not as load bearing as the rest of the structure. Some structural adhesives are just as strong as the composite itself, but it should be noted that the expense of the product is right up there as well. For some bonding applications, fillers may be needed.
See an example part below. Notice the tooling surface would be nearly impossible to layup and strip with a one-piece mold without having to create a means of beating it off of a tool. However, if the part is split in two pieces and secondarily bonded together, it will make the process much easier to strip and provide a near seamless part once bonded.

See below for creating 2 molds in order in achieve two parts that will be then secondarily bonded into one part.
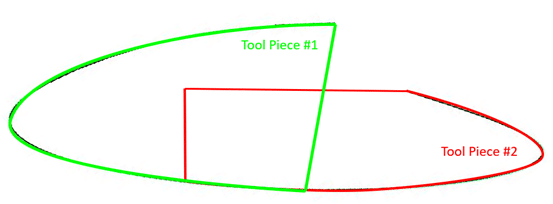
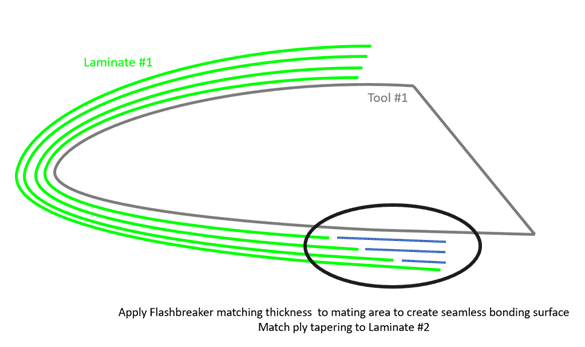
To provide a more seamless transition when the parts are secondarily bonded, an option is to stagger the layup of the plys in the overlapping areas shown below. Determine which will be the bottom piece, for this example, piece number 2 will provide the bottom mating surface.
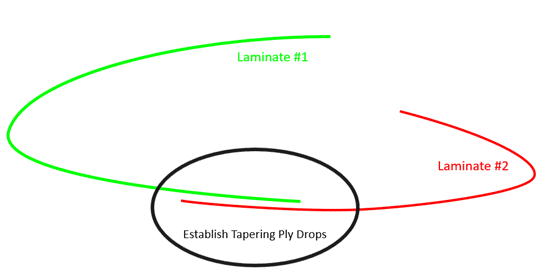
For providing an example, say that the laminate structure of both laminates consists of (4) plys. In the circled area above, taper ply drops as shown below. Leave between 0.5” to 1.0” inches between each ply drop. If you know the cured ply thickness of each ply, select a Tooling or Flashbreaker tape that closes matches that of the fabric material of the laminate. Recreate the ply drop area along the surface on Tool #2 before layup. If the 2 laminates closely match, the secondary bonding piece will fit like a puzzle together and provide locational accuracy for bonding.
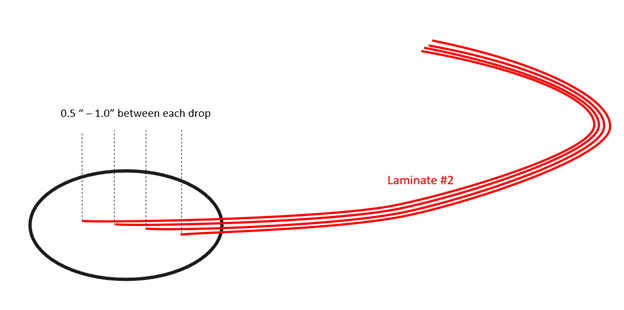
Note: The same laminate example above could be made from a 2-piece tool on the outside of the part. However, special attention to layup and bagging schemes should be noted as areas in female radii will tend to bridge and wrinkle along these types of surfaces.
Fillers can be bought “as-is” with the reinforcement already provided within the adhesive. Some can be made at home or in the shop. Thickening of these adhesives can be made possible by adding in finely chopped fabric from fiberglass or carbon fibers then mixed into the uncured adhesive. It will make the product thicker and sometimes much easier to work with.
Applying adhesive can be messy. Especially considering the fact the adhesives can run out and get all over part surfaces. A solution is adding in Flashbreaker tape over which areas do not need the adhesive. Thinner Flashbreaker types such as “Flashbreaker 1” are more suitable for these applications and will cover intrigue contours easier than a “Flashbreaker 5”. After secondary bonding cleaning and prep steps, add needed tape to the areas in which areas do not need adhesive applied.
Squeeze out of the adhesive during secondary bond is a good thing. It ensures the bonding surfaces are adequately covered. Each project should have a small amount of squeeze out. Upon bonding adhesive being cured out, remove the Flashbreaker tape and sand away squeezed out adhesive. In some areas wet sanding may be involved to remove every part of the adhesive that may be showing but use caution to not damage underlying fabric surfaces.
