Tooling putty can be one of the most effective ways of reinforcing or strengthening a mold or tools surface. Tooling Putty will add stability and rigidity to any layup mold. The advantages of tooling putty allow for quicker and lighter molds to be built with fewer needed reinforcement layers. Use of tooling putty could eliminate hours from a job that would otherwise be taken to reinforce structural areas of a mold with fabric materials. If working with complex or fragile molds, adding tooling putty to the layup of a mold is essential to having a long-lasting productive piece of equipment.
Note: Use of the same resin systems is important when making a tool so if an epoxy-based tooling putty is used, use of a tooling resin would also need to be epoxy based.
Place part or surface in which tool will be made onto a surface or flat plate in which is conducive for layup of a mold. Apply mold release to part’s surface in which a tool will be fabricated from (per manufacturers instruction)
Apply epoxy surface coat or tooling gel / resin to surface of part as needed, ensuring coverage of all surfaces of the given part. Make note of pot life or working time in order to give enough time to apply needed reinforcement of plys and putty. Once all part surfaces are covered with given tooling resin, application of optional layers of fiberglass may be added with resin in order reinforce mold. Ensure fiberglass or reinforcing fabric is adequality wet out, just as a traditional layup. While resin is still in a tacky state mix and apply tooling putty as below. Tooling putty may also be used alone to reinforce a mold surface.
Most Epoxy based tooling Putty is generally mixed at a 1 to 1 ratio. Measure out an equal amount of both parts A & B using a scale and cup per Composite Envisions Epoxy Mixing Guide and manufacturer’s instruction. Mixing can be achieved by hand or by stirring. For CE Epoxy 2-part Tooling putty, more agitation or mixture will pop micro bubbles within the putty matrix yielding a less viscous system. As the putty reaches desired viscosity, application can be made by pouring or by hand onto the tooling surface.
Apply tooling putty in small amounts to ensure that there is no trapped air within the tool. Application thickness of tooling dough should be between 1/4” and 1/2”. This thickness will provide adequate support for multiuse tools and mitigate chances of cracking for nearly any mold size going forward.
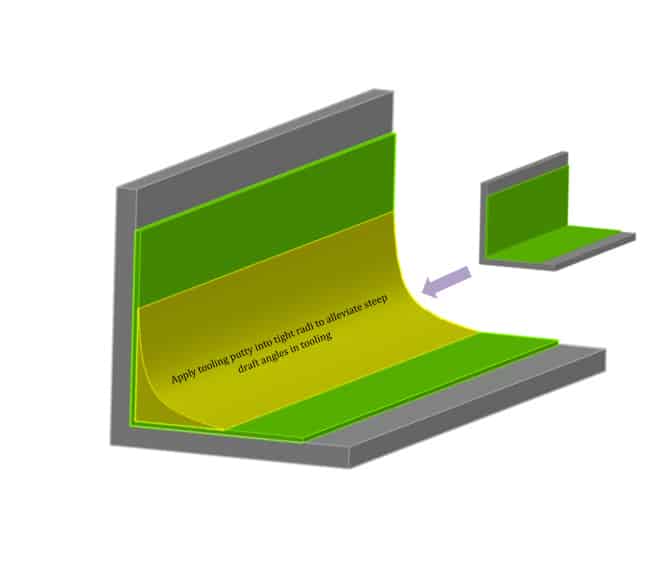
It is good practice to place tooling putty into female radii to alleviate any steep draft angles in tooling structure. This will also allow for ease of layup of optional final fiberglass or other fabric layers as material will drape over given areas smoothly.
Note: On molds that are 2 pieces, do not place Tooling putty onto part edges in which mating surfaces will be clamped down. This could cause uneven pressure on the layup surfaces